Written by Janice Sanford Beck
All images provided by artist
Learn more about Prairie Fibre – Full Circles

In the Beginning
It all began with my grandparents’ visit the summer I was four years old. Actually, it began hundreds if not thousands of years earlier, when people realized that wool could be spun into yarn, which could then be manipulated on pointed sticks to create a warm, stretchy fabric. This women’s knowledge was passed from generation to generation until at last, on that sunny Alberta day, it made its way to me, right there on the deck of our Pigeon Lake cottage.
I don’t know what prompted my desire. Perhaps I had been mesmerized by the movement of Grammy’s hands, hands conditioned by the incessant labours of raising a family of eleven on scarce cash and abundant resourcefulness. I too wanted to knit. The fact that my physical coordination lagged behind the force of my will was a surmountable challenge, thanks to Grammy’s patience and Dad’s ingenuity. We sat on that deck for hours as she guided me in manipulating the sawed off knitting needles he creatively reduced to my size.
Grammy’s next birthday card teasingly asked whether I had knit my sweater yet. I had not. But I did keep knitting, guided and inspired by knitting friends and our mums. I finished my first sweater at the age of eleven and enjoyed knitting circular yoke sweaters in junior high (with the wonky tension that came of putting the cart before the horse, charging into colourwork without any instruction in the techniques of stranded knitting). I knit through high school and university, with an Aran cable-knit sweater of pure Irish wool (which I am still wearing, nearly thirty years later) as my crowning achievement.
On to Spinning
At a certain point, I felt that I had all the sweaters a person could manage, and realized that if I wanted an endless knitting project to keep me clothed, I should move into socks. But it seemed odd that in spite of the hours of devoted labour I was putting into my socks, the wool alone was costing me more than many a store-bought pair. I was inspired to take things back a step. What if I could not only knit the socks, but also spin the wool?
Conveniently, this question arose as my family was preparing to embark upon a trial year on Judy Ternier and Tom Burns’s off-grid family farm. Our hosts kept sheep and spun wool; upon hearing of our forthcoming adventure, a member of our church gifted me with my very own spinning wheel.
The summer was filled with tending and harvesting the extensive vegetable gardens that form the backbone of the farm’s economy. But come Thanksgiving, Judy, my mother-in-law, her sister, and I were able to set aside our garlic braiding for my inaugural spinning lesson. I would love to say that I was tightly drawn in from the start, inseparable from my wheel, spinning up the wool for a cozy sweater that very winter. Reality was much more measured. I tried spinning and enjoyed it. I grasped some of the basic principles and tried to glean from my various mentors’ tools and techniques a sense of how to prepare fleece for spinning.
But the demands of partnering in the Community Shared Agriculture operation, sharing in the home duties of running an off-grid household, homeschooling three children, and attempting to assist with butchering and meat packaging filled the hours. I continued to spin as I could, but ironically, it was not until moving back to the city eight years later that I really began to apply myself to spinning. That was also when I approached the loom.


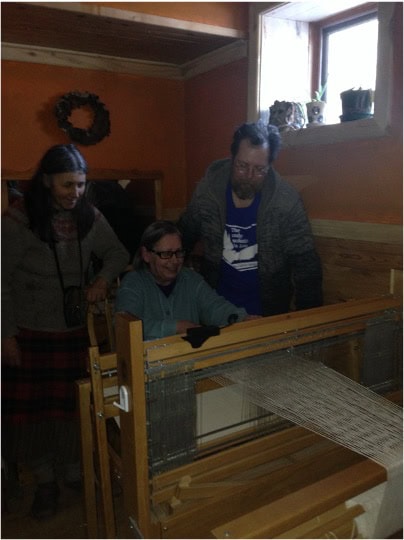
The Loom
Actually, the loom had been quite close throughout the adventure. Echoing the manner in which my spinning wheel came to me, my husband’s aunt, Jacquee Falardeau, had offered us her floor loom upon hearing of our upcoming move. We gratefully accepted, though our living space was a far cry from the ideal sunlit studio. The only place to fit the loom was in our basement bedroom, nestled up to the foot of the bed. Our son crafted a top for it so that it could serve double (triple?) duty as a writing desk when not in active use.
Jacquee even came out to the farm one winter to offer weaving lessons. Regretfully, I did not participate. My hands felt plenty full and spinning was my priority. My husband, Shawn, learned to weave and enjoyed periodically tossing the shuttle over the ensuing years. But when the time came for us to return to the city, the loom’s future was uncertain. Shawn did not anticipate the demands of full-time office work leaving him enough time to use it. I was not sure that weaving was for me. We pondered its future. We even offered it to a friend. Thankfully, she declined. Slowly it came to me that I might as well give it a try. The loom not only moved with us, but was set up in a prominent place in our open-concept condo. It sat there nearly half a year until COVID-induced isolation prompted me to take the next step.
First Attempts at Weaving
I took to weaving like a weft sliding between the threads of warp. Though it was not without its challenges. By this time, a stroke had all but eliminated Jacquee’s ability to communicate. My means of instruction and support consisted of a highly recommended book (Deborah Chandler’s Learning to Weave), Shawn’s vague memories, some You-Tube videos (where the looms all seemed quite different from mine), and email contact with Ruth Anne Rudack, a former colleague and avid weaver.
Ruth Anne urged me to connect with the Saskatoon Spinners and Weavers Guild, which I eventually did – and have not looked back since! I first joined the Weaving Study Group, whose members have been tremendously welcoming and supportive. I have since attended workshops, been involved with guild sales, and participated in the spinning group. It was through the guild, and Jude Haraldson in particular, that I learned of the Full Circles project.
Prairie Fibre – Full Circles
Prairie Fibre – Full Circles was an initiative of the Prairie Fibreshed network, a group of Saskatchewan fibre producers and craftspeople devoted to strengthening the local fibre economy and ecology, from soil to soil. They proposed an exhibit of work by Saskatchewan craftspeople using only natural materials grown/raised and processed here in Saskatchewan. Although a stretch for my skills and experience, it seemed right up my alley.
My years of work in the local, sustainable food movement were rapidly extending into the realm of fibre. Much as I love making any beautiful fabric, my primary motivation in fibre arts has been around re-appropriating the means of production; reducing, reusing, and recycling; and strengthening connection (and awareness of that connection) with the natural world that sustains us. Through this work, I am also gaining tremendous appreciation for the traditional knowledge developed and transmitted through the centuries, largely by women. I knew that my imagined project was ambitious: my previous design work amounted to a single sweater, the number of skeins I had spun could be counted on one hand, and my sole experiment in natural dyeing had yielded disappointing results. Nevertheless, I felt that the project would be worth the commitment.
The Fleece
The first step was to acquire fleece. I had a tub of inherited fleece (of widely varying quality) that I had been spinning. Most likely it was Saskatchewan fleece, but I could not be sure. Fortuitously, Judy, my original spinning teacher, had recently purchased fleece from Kelly Cooper of Fusilier Sheep. Finding that some was not suitable for spinning in the grease, Judy offered me an apple box of culled wool, which I gratefully accepted, then threw in a paper grocery bag stuffed with cleaner fleece. A note tucked into the bag indicated that the fleece was from Gilroy M109G. In a later conversation with Kelly, I learned that Gilroy was a blue-faced Leicester who had been sold as a yearling. This was his only sheared fleece. I considered it my magic bag of fleece, as no matter how much I removed, cleaned, and spun, the bag still seemed full. Eventually, however, its magic faded; my project ultimately exhausted its contents.


Natural Dyes
Next step was to attempt dyeing. My first experiments involved dyestuff from our backyard. The yard was one of the selling features of our house. Not that there was anything spectacular about it. On the contrary;it was treed, but not to the south, and it was relatively wide. It was a very nearly blank slate for my gardening adventures.
For the most part, I intended to leave what few plants (other than grass and weeds) were already established in the yard. But there was one plant that troubled me. It lay in the centre of what seemed an obvious path to the back gate, with no other foliage nearby. A likely volunteer. I kept an eye on it, but somehow could not bring myself to remove it. Awkward as it was, there was room to manoeuvre my bike around it. And it did have beautiful flowers. Though they were somewhat suggestive of a thistle. No thorns though. And really they were more like a bachelors button. I came across a description of a noxious weed that looked worryingly similar to my mystery plant. But I was not sure. And after all, it was a solitary plant. No sign (yet) of a desire to take over the neighbourhood.
Year two it was back, still a solitary plant, now somewhat larger. I remained both vigilant and reluctant to pull. A friend introduced me to a plant identification app. So high tech. I snapped a photo of my enigmatic neighbour and waited while the program searched its database. Up it came. My identification: serratula tinctoria or dyer’s saw-wort. I had considered removing a dye plant from my yard without even getting to know it! No wonder I hesitated.
My interest in botanical dyes had been slowly growing, but I was not ready to take the plunge until the spring of 2024. Having spent the late winter reading a selection of the public library’s collection of dyeing books, I proceeded to mordant a freshly-spun skein of wool. I then divided it in three. One was to be dyed with dandelion roots (which I had been steadily digging out of the yard with little compunction – except perhaps the compulsion to clean and use some of the spectacular roots, be that as food or as dye-stuff). A second would allow me to finally make use of a jar of dried hibiscus my mother-in-law had given me a number of years back. And the third offered the opportunity to get better acquainted with my saw-wort.
First Attempts
The dandelion roots and hibiscus turned their respective water baths into richly coloured dyes, one a deep brown and the other a powerful burgundy. The third pot was less impressive. But when the skeins of wool emerged from their baths, it was the serratula that caught my eye. It was a fascinating neon yellow, reminiscent of 1980s ski attire. The hibiscus was also pleasant, but seemed pale compared to the liquid in the pot. The dandelion was distinctly disappointing. The wool was the colour of coffee ice-cream, barely discernible as distinct from the original white. I will not take this to mean that I should have left the roots in the ground, but I may divert more to the kitchen as a root vegetable or hot beverage.
Meanwhile, other potential dyes were catching my attention. Japanese indigo excitement was in the air at the Saskatoon Spinners and Weavers Guild. I had obtained an envelope of Jude Haraldson’s seeds, which were growing nicely in a sunny window. On a visit to Alberta’s Custom Woollen Mills, I was inspired by their carrot-top dyed wool. It was reminiscent of my saw-wort results, but whereas I had only a single saw-wort plant, my allotment plot would yield me an abundance of carrot tops. A new plan was hatching.
Our next stop was ALCLA Native Plants. Several of the plugs I had pre-ordered had not survived the winter, so I had the pleasure of perusing their stock in search of substitutes. A plant with the telltale “tinctoria” in its name caught my eye. How could I resist coreopsis tinctoria – both native and a dye plant!
I also realized that both my own garden and a friend’s naturalized yard that I tended hosted another native dye plant: goldenrod. Unfortunately, I had not done enough advanced preparation to take full advantage of goldenrod’s gifts. I had read that it was important to use the plant fresh, as the blossoms were liable to go to seed as they dried. Since I did not have time to prepare wool for in-season dyeing, I decided to follow another dyer’s tip that all aerial parts of the plant (leaves, stems, and blossoms) could be used and that dried was just fine.
As predicted, my flower heads went to seed on top of the fridge. I made a mental note to harvest earlier (and more abundantly, though that would require an alternative drying arrangement) next year, and carried on in a spirit of experimentation. As it turned out, my second source proved quite correct: the wool turned a distinctive earthy yellow colour, a couple shades deeper than the carrot tops. I am curious to see how the colour from fresh plants compares. And whether it would make any difference if the flowers were harvested early enough that they did not go to seed as they dried. Projects for future years.
My garden was also home to a patch of calendula which, in spite of an earlier disappointment, I remained convinced was a promising dye plant. Surely the mainly imperceptible colour I had previously obtained was due to the vague instructions I was following from a children’s herbalism book. Surely if I went with equal weights of dried flowers and fleece I would get a more vibrant colour. Surely … not.
Throughout the late summer I had dutifully plucked open blooms on my daily garden rounds and left them to dry on a screen on top of the refrigerator, carefully separated from both the minuscule coreopsis blossoms and the stack of goldenrod stems. It was a good thing I maintained that separation. Because unlike the disappointingly weak calendula dye, the coreopsis produced a vibrant, nearly glowing, orange hue. Dye pot magic! Not much of it though. My solitary plant produced less than a gram of dried flowers, which allowed me to dye a single lock of fleece at full concentration. But I had to see what this dye could do, so I tossed in another small pile of mordanted fleece. At this lower concentration, the colour was still vibrant, but it lacked the intensity of that first lock. I would simply have to grow more coreopsis.

Autumn Experimentation
Delightful as the various shades of yellow were, what really got me hooked on dyeing was the fabulous rich blue produced by the leaves of my Japanese indigo plants. I had been advised that dyeing unspun fleece was tricky, but also that Japanese indigo leaves had to be used fresh. Frost was overdue and I didn’t have time to spin. Nor did I have time to attend the indigo dyeing bee Jude had organized; I ended up doing my dyeing the same day but at home, where I could multitask – perhaps beyond the point of wisdom. Nevertheless, the results were spectacular! And the play of light and colour that resulted from the variegation of spinning dyed fleece motivated a spate of further experimentation.
A coordinating dye source appeared shortly thereafter. Knowing of my affinity for local foods and my innate reluctance to let anything go to waste, two friends had invited me to share in the overwhelming abundance of their grape vines. I do not particularly care to eat Concord-style grapes, mostly because I find a mouthful of seeds unpalatable. But we do enjoy offering a non-alcoholic beverage on special occasions. I figured that home-made grape juice would be perfect. I steamed the grapes in my steamer-juicer until the juice pot was nearly full, siphoned it into glass jars, and processed them in my canner.
The process left the pot full of delightfully rich purple grape pulp. What did I have to lose? I transferred it to my dye pot, filled it with water, brought it to a boil, simmered it for an hour, and left it to sit overnight. I then strained out the grape flesh, satisfied that I had fully accepted the gifts it offered prior to its final bequest as nourishment for the compost pile. Not having any mordanted wool to play with, I decided to sacrifice some of the pale carrot-top wool. No regrets there.
The regal purple of the dye adhered beautifully, creating a much richer colour than the mauve I later obtained from clean, mordanted wool immersed in a second batch of grapes. Though I can’t be certain how much of the difference is due to the overdyeing and how much to the fact that I had fallen asleep while the first batch was in the dye pot, leaving it boiling for an unspecified amount of time, whereas the second batch was maintained at a well-behaved simmer. More room for future exploration.
Meanwhile, I did have the opportunity for one further experiment with this season’s grapes. Having read that dye could be saved, I poured the second batch of grape dye into a gallon jar and placed it in our poorly insulated laundry room. By late winter, it had a thin layer of white mould across the top. I figured I had better do something with it before the strengthening sun warmed the room. I carefully opened the jar. The scent of fermented grapes permeated the room. I had inadvertently made wine. Or, more likely, some dissatisfying facsimile thereof. Given the mould – and the fact that it had previously been used to dye mordanted wool — I refrained from testing the flavour. But our house was permeated with the scent of wine for days to come.
I figured I had best remove the mould before dyeing. Tack one: skimming. Not particularly successful. Tack two: straining the dye through cheesecloth. Also of dubious impact. I decided to simply proceed, remaining mould and all. I brought the dye to a boil, lowered the heat, and added my prepared wool. The delightfully vibrant colour emerged instantaneously. I was so impressed that I followed up immediately with a second batch of fleece, which turned out equally well. Fantastic.
Unfortunately, I did not have enough purple or blue fleece for either of them (or even the two of them combined) to be the primary colour of my piece. For that, I would have to turn to my most abundant dye source: onion skins. Both my allotment plot and Largo Farm, where we have a year-round vegetable share, had bumper crops of onions that summer. I dyed with and without mordant, yellow and red onions. I liked them all, but my favourite was the coppery hue of mordanted wool dyed with yellow onion skins. Good thing, because the abundance of the supply meant that this colour would be a mainstay of my project.


Design Considerations
But before getting to colour design, I had to test the structural design of my intended garment. Using all my homespun wool to date and some coordinating commercial yarn to make up the required yardage, I wove a prototype garment. To reduce the amount of precious homespun that would be wasted, I designed the sweater to be woven on one warp, with a single piece for the body and non-tapered sleeves of the same width. I would shape the neck opening on the loom, using tapestry techniques.
This design would have worked well enough had I not second guessed myself during the weaving and extended the size of the neck opening, resulting in a excessively large neck hole. I also realized (too late) that I should have been working both sides of the neck opening at once and filling the hole in the centre with waste yarn so that I could still properly beat the weaving. As for the wide sleeves, they look fine, but are not very practical. I call it my “Lady of Leisure” sweater, as I am very limited in what I can do while wearing it without the sleeves knocking game pieces out of place or sampling every dish on the table.
I decided to alter my design by making rectangular sleeves the width of my cuff and knitting tapered gussets to provide the extra width higher up. Conveniently, two such rectangles matched the width of the body of my sweater, allowing me to proceed, once again, with a single warp. Reluctant to cut my weaving (and not confident I had the width required to hem them), I decided to weave the two sleeves side by side on my warp, using a different shuttle for each to create selvedges on either side of each sleeve.
I was nearly ready to determine my colour scheme. To avoid horizontal striping and the complications of matching stripes on a garment, I decided on a single-coloured weft. The abundance of onion skins made their electric copper colour a natural choice. The remainder of my rainbow would feature in the warp. How many ends I could make of each colour would depend on the warp length. Once I started measuring wool for warp, I would know the basic parameters for my colour scheme.

Spinning
But before I could do that, I would need to spin my fleece. Easier said than done for a relatively inexperienced spinner painstakingly flick carding all the dyed fleece in hopes that this preparation technique would strengthen the warp. And there was still more fleece to wash in preparation for dyeing with my remaining onion skins – which were taking over a corner of my kitchen like moss on a moist log.
The Spinners and Weavers Guild biweekly spinning afternoons proved a boon for my fleece preparation. This tedious work was less likely to be set aside by the lure of garden projects with a regular date set on my calendar. From there, it was a natural discipline to make time between meetings to spin all that had been prepared. By late spring, all but the final onion-dyed fleece was neatly arranged in spun and plied skeins.
Colour Design
Based on the dimensions of my niddy noddy (skein-winding tool), I calculated the yardage I had spun of each colour and compared that to my required warp length in order to determine how many warp threads each colour would provide. Since my spinning technique had improved since my prototype yarns, I also had to determine whether I needed to adjust the sett. With the help of a borrowed tool, I wove squares of similar weight yarn (I did not want to sacrifice any of my precious dyed homespun!) and decided that the original sett of 6 epi was still appropriate.
Then, inspired by a guild-sponsored workshop on playing with colour and texture (presented by Robyn Spady), I got out my graph paper and pencil crayons. I drafted design after design after design.


With input from my husband and son, I narrowed the list down to my top three choices, which I wove small samples of. And was I ever glad I did! The larger colour blocks in the designs that had caught my eye on paper did not appeal when worked up in my plied homespun. They would best be saved for future experimentation with finer yarns.
In the meantime, it was back to the drawing board. As it turned out, it was one of my first, simplest, patterns that was best suited for my materials. Plain weave with a centre stripe of purple-flanked blue would be framed by the brown of red onion skins with a stripe of yellow down the centre – and extra yellow on either end to accommodate my yarn quantities (or lack thereof!).


Weaving At Last
I measured the warp (with only minor surprises) and at, long last, warped the loom. Roughly a year after I had first begun preparing the fleece, I was finally ready to begin weaving. Knowing that my weft consisted of multiple dye-lots of fleece (some of which were still to be dyed), I decided to use more than one shuttle so as to avoid jarring shifts in hue. Not fully remembering the three shuttle technique I had recently read about for blending colour in rag rugs, I began with the knitting technique of alternating between two balls. It worked well to blend colours, but left messy selvedges. Back to the rug magazine to reacquaint myself with the actual technique. Not surprisingly, the result was much more satisfactory than my improvisation.
I got to the neckline, breathed deeply, and began using a tapestry technique for creating angled lines of weaving. Grateful for my recent practise on a diamond-themed rag rug and the hard-earned awareness of the importance of filling in the future neck hole with waste yarn, I proceeded to weave the opening. Much to my dismay, I realized that I preferred the more subtle colour interplay of my waste yarn (variegated grey homespun loom waste from my sample garment) with the colourful warp to my actual project with the copper weft. Ah well. There was nothing to do but take a photo and make note of this latest learning for a future project.
Again, the neck opening looked small, but I knew better than to expand it. I simply breathed deeply and continued weaving, telling myself that I could always figure out a way to enlarge the hole later. Nevertheless, my worry persisted until I cut a plastic bubble wrap mailer to size and tested whether my head would indeed fit through. It did, with only the slightest stretch. Phew! When it came time to finish the neck hole, I also realized that in pulling enough yarn to tie the knots for the Damascus edge, I compressed the weaving somewhat, thus slightly enlarging the neck hole. There was no reason to worry.
Innovation Along the Way
Once I had woven the sixty inches of the sweater body, it was time to consider the sleeves. The pause between sections inspired me to take a closer look at my wool supply. I had some yarn left in each of my warp colours. Would it be enough to add some striping to the sleeve cuffs? My rough calculations indicated that I had enough of each colour to roughly mimic their distribution in the warp. It was at this point that my inherited collection of weaving tools again proved its worth. I found a set of mini stick shuttles that were not only beautiful and pleasing to the touch, but perfect for incorporating small amounts of thick weft into the tight spaces of a split warp. The effect was delightful; I regretted not having enough dyed yarn to have similarly embellished the body of the sweater.
Knitting Sleeve Gussets
Once the weaving was complete and the neckline finished, my attention turned to the process of knitting the sleeve gussets. Somehow I had imagined them to be a relatively small piece of work. It was only when I looked more closely at the instructions in Weave, Knit, Wear and compared my woven sleeve size to the prescribed finished dimensions that I realized I would be knitting four triangles, each of which would extend the entire length of the sleeve and reach a maximum width of 5 1/4.” I did not have enough onion-dyed wool remaining to complete them as planned.
I also noted that Shangold did not propose the type of basic shaping I had been imagining, but rather wrapping and turning for short rows – a technique I had only used once before without really understanding what I was doing or feeling confident that I was doing it correctly. This did not bode well for the level of design work this project required of me.

Finishing Touches
All that remained was to stitch my sweater together. I decided that in order to both reduce the bulk of the seams and extend my yarn supply, I would use a single ply of my dyed yarn for sewing. Fortunately, I had some single-ply yarn remaining on a bobbin; once this supply was exhausted I had to deconstruct what little remained of my plied copper yarn. I soon discovered that in spite of its benefits, there was a distinct disadvantage to the single-ply yarn. As I should have expected, it lacked strength. If I was not careful where I inserted my needle and how gently I pulled the yarn through, it was liable to tear, leaving me with many loose ends and the potential of running out of yarn. If this were any other project, I would have been inclined to substitute a stronger, thinner yarn, but I had none that fit the local fibreshed criteria. Instead, I proceeded with utmost caution – yet another skill this project was nurturing.
At last, with the seams sewn, the loose ends woven in, and the garment washed and pressed, my sweater was complete. The sleeves were not, as I had feared, too short, nor was the colour combination too brash. My boldness in undertaking this project had not yielded disaster. On the contrary, guided by shared wisdom, the endeavour pushed me to develop the skills needed to craft my own clothing from locally available materials, strengthening my connections with both this place and fellow creatives who dwell here. It also yielded a wearable sweater. Moreover, while I hate to contemplate the sweater’s ultimate demise, it comforts me to know that whatever pieces of it cannot be repurposed into something new will be able to return to the earth and generate new life in a totally different form. If only Grammy were here to see where our shared passion has led me.