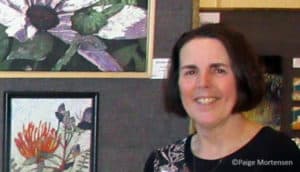
Written by: Paige Mortensen, SCC member and watercolour batik artist
 Batik is an ancient art form. The process of dying fabric using a wax resist process was used in Asia as early as the first century AD. I do not know when the first artists started using a batik-like process on paper but I first heard about it in 2012 and have been fascinated with it ever since.
The Ginwashi paper that I use is semi-transparent, light-weight and full of small fibres that attract the pigment which adds to the texture of the finished piece. The process involves alternating several layers of wax and watercolour. The wax is used to preserve the colour and value of each layer in turn. The watercolour layers are applied from light to dark with attention to the effects of layering transparent colours. The final step is to iron off the wax and watch the end result appear. It is always an exciting moment for me!
The finished pieces look like paintings and yet are also fabric like. They have qualities of painting, drawing and fine craft.
For those who are curious here is a glimpse into my watercolour batik process.
Tools I use

Here are the tools I use:
- Ginwashi paper – notice the obvious fibres in it – they help create the texture!
- A paint tray and brushes – I just use a small, inexpensive brush to mix the colour and one of these large hake brushes to apply the paint to the paper
- Watercolour paints
- Paraffin wax
- An encaustic iron to melt the wax
- Sponges, stamps, tiny brushes, etc to apply the wax
Preparations

I usually work from photos I have taken which I edit and crop to decide on the composition. Although Saskatoon is called the city of bridges, it is nothing like Venice. The bridges there are amazing – every one is different and you never know when the next one is going to appear around the corner. From my collection of bridge photos I selected the ones I wanted to work from and:
- Drew the basic image onto a piece of paper the size I want
- Went over the lines of my drawing with a black marker
- The Ginwashi paper is quite transparent so I then traced the drawing onto it with a Micron 05 pen (permanent and waterproof)
Adding a layer of wax

I use a piece of wax paper under the Ginwashi paper so the wax doesn’t stick to the painting surface.
The purpose of the wax is to preserve the colour of the paper at a given point in time…so, anything that needs to stay white needs to have wax put over it before any paint is applied. In this case I just put a bit of wax in a couple of spots on the water to create some highlights.
Building up the colour

Now, the first layer of light colour can be applied. Some of the things I think about:
- This is very watery paint and will very quickly run uncontrollably across the paper
- These are transparent watercolours so every layer will show through to the top
- The colour will dry much lighter than it looks going on
- What colours can I layer to get the right colours at the darker layers
Mostly, the goal is just to get the first light colours on there and see where they go. Letting them run into each other creates softer edges and unity of colour in the finished piece.
This then needs to dry before the next wax and watercolour layers can go on.
The ugly phase

More wax…you can see how much lighter the colours are now that it has dried.

More paint…and so on.
In these early stages it can get to look quite ugly. Everything is the same value, the drawn lines are disappearing and there is little definition.
Adding darks
Five or six layers of wax and watercolour later the darks get dark enough that I once again begin to feel that there is hope for a successful piece.
Iron off the wax
When I feel like the piece is finished I make sure the entire surface is covered with wax then place it between layers of newsprint and iron it. The wax comes off onto the newsprint and the image emerges in its finished form! This is my favourite step in the process!
Finished piece

Under the Bridge ©Paige Mortensen 20×10” 2016
Thanks to the Saskatchewan Craft Council for this opportunity to share. And thanks to you for reading!
—
Paige
www.facebook.com/PaigeMortensenArt/
If you’re an SCC member and have a blog post to share, please contact Sydney Luther at scc.newsletter@sasktel.net. Thank you!


