Written by: Gary Greer, knife maker and SCC juried Professional Craftsperson
The most difficult part of creating a knife is committing to a final design. In the beginning one has an idea which has to be brought forward into the physical world. It’s easy to draw the design on paper, but because of the limitations of ones tools and skills — this drawing is not always possible to materialize.
This is where the challenge comes in. You may have to build a new machine, find new materials, learn a new skill, or all of the above.
Even then — sometimes you have to go back and modify your original idea to accommodate all these changes.
Now that you have decided it is possible to build this knife — you carefully plan all the steps in a rigid order towards the completion of the knife. One major factor in this assembly order is that at some point you have to heat treat the blade. After this step NO alteration of the design can be performed. The blade and tang are now fully hardened and no new holes, file work or any other process can be performed. This being said — all the parts and pieces must be carefully crafted and trial fit dozens of times to make sure all the parts are a perfect fit before this hardening process takes place. There is no going back now and changing something.
After your sure everything is perfect (or as close to perfect as any perfectionist can attain), you go ahead and harden the blade.
The next major step is the glue up stage. The stainless steel has to be taken up to around 2000 degrees Fahrenheit to harden it and when this process is done — the blade is covered in a dark oxide which has to be painstakingly removed. Then the blade has to be mirror polished before the final glue up stage. This step can cause one lots of grief if you haven’t been meticulous in your pre-fitting steps.
This particular knife has 21 separate pieces and once they are all covered in sticky epoxy — there is no time to alter anything. The epoxy takes about 24 hours to fully harden and now what you have is just a block of glued together pieces that doesn’t have any shape or form. At this point — your skills and tools will make the birth of your idea happen. There are many, many stages of this whole procedure where one slip of the hand or a lost moment of concentration can ruin the knife beyond repair.
This skill of making your hands and machines do what your brain sees in your mind is the real skill of being any craftsperson. Through careful thought and manipulation and after sometimes a month of intense labor — your vision becomes a reality.
The following photos are mini steps and stages of designing, fabrication, and trial fitting of these pieces towards the finished end.
Photo numbers 1 to 4 are in the designing stages of the fancy file work – one of the focal points of this knife. This file work is all done with tiny jewelers needle files to a very exacting scale… One slip here and the whole blade has to be redone. Turn off the cell phone and the radio — no distractions at this point… I try to design different file work patterns on each of my knives. These patterns are laid out in different colors of felt pen to differentiate the various file types necessary to cut the desired pattern.

1
2
3
4
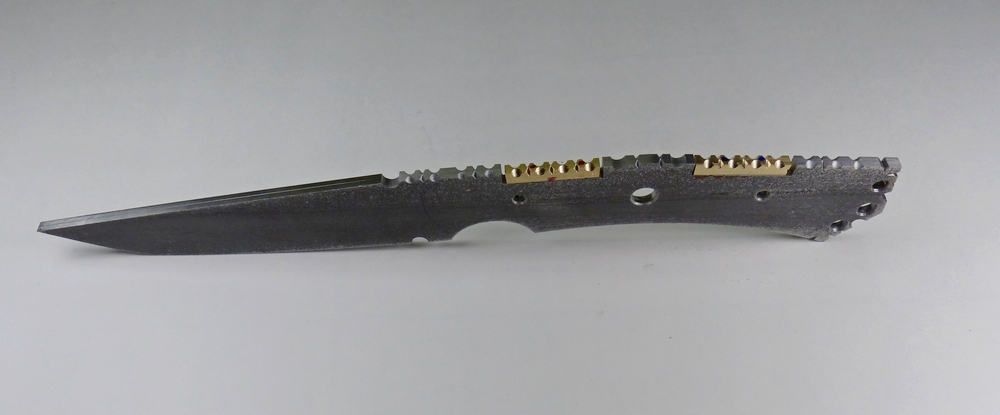
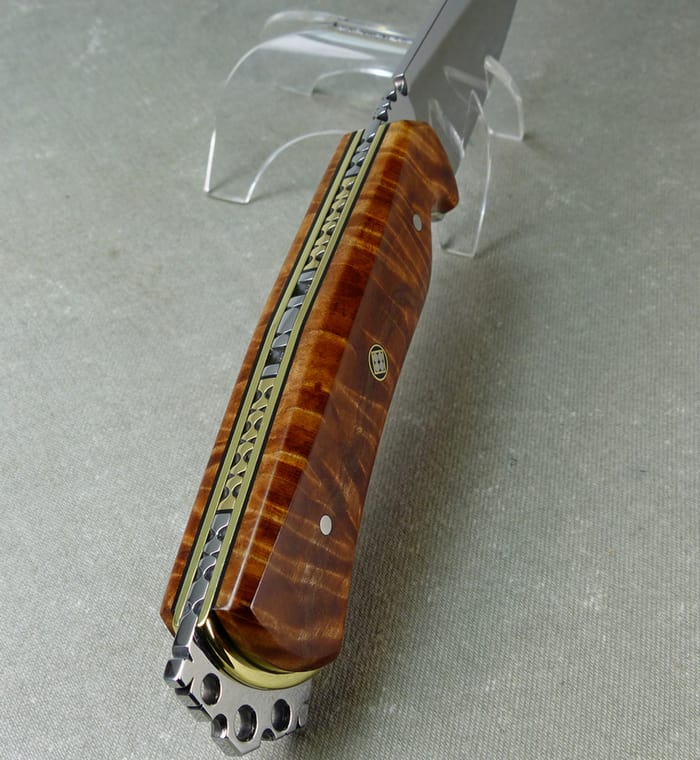
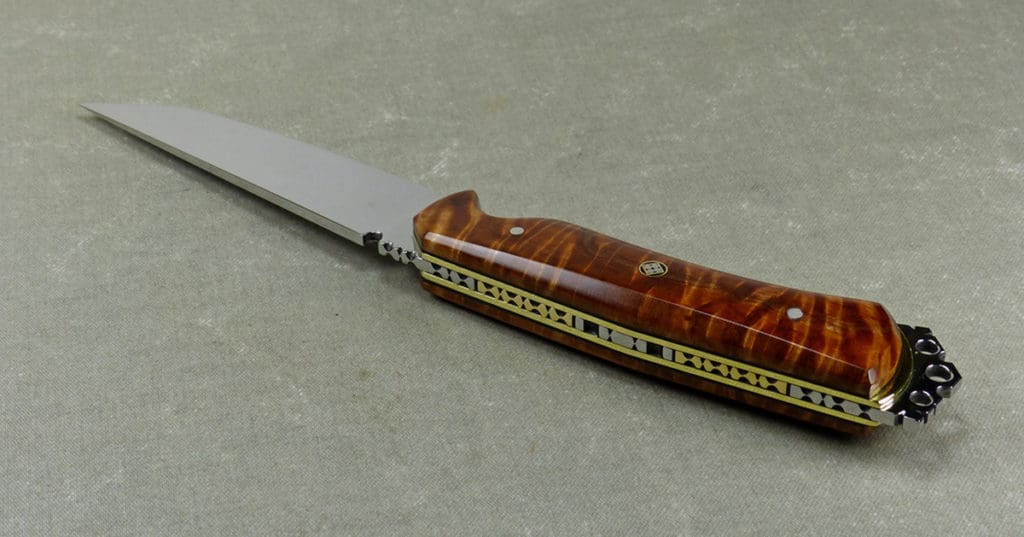
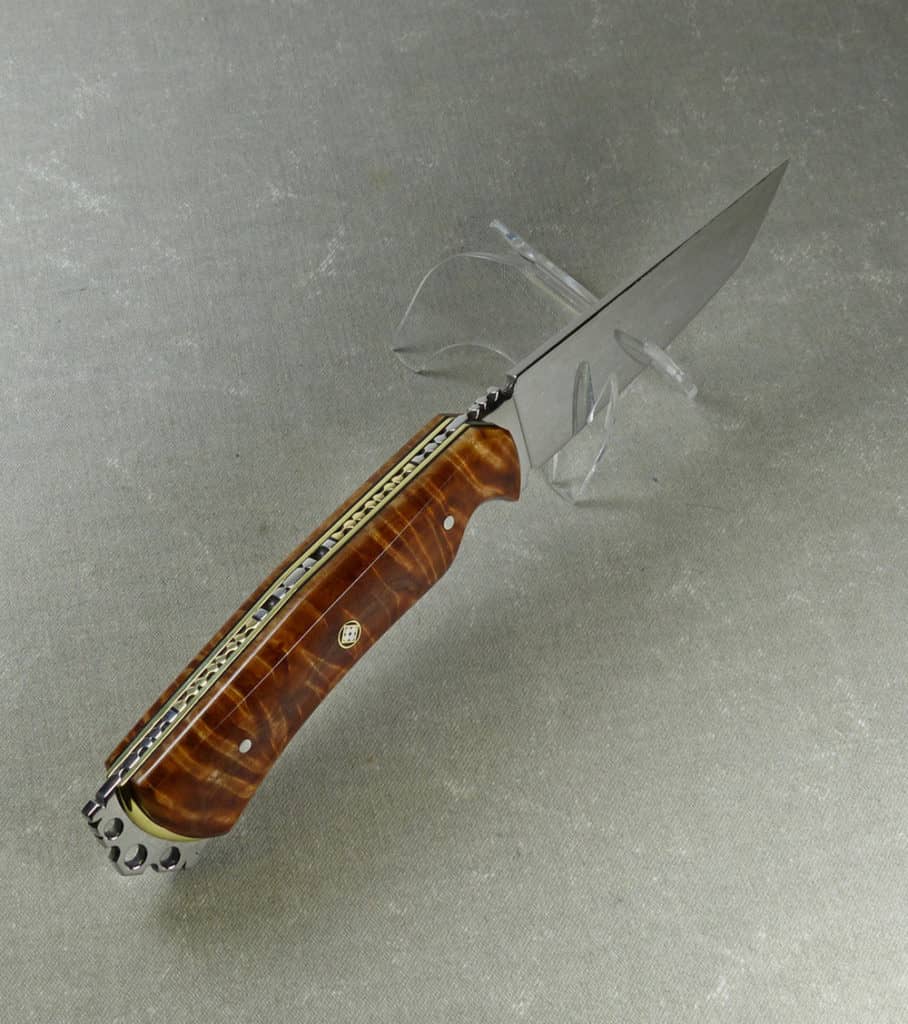
Photo numbers 5 and 6 show where I have cut out the tang to allow for the INLAID brass file worked sections. This was my unique twist for this particular knife. Normally knife makers just do the file work on the back of the spine itself, but my new technique was to cut out sections inside this file work pattern and insert another pattern made from a different material… and yes I do drive myself crazy by doing this type of innovative improvising.
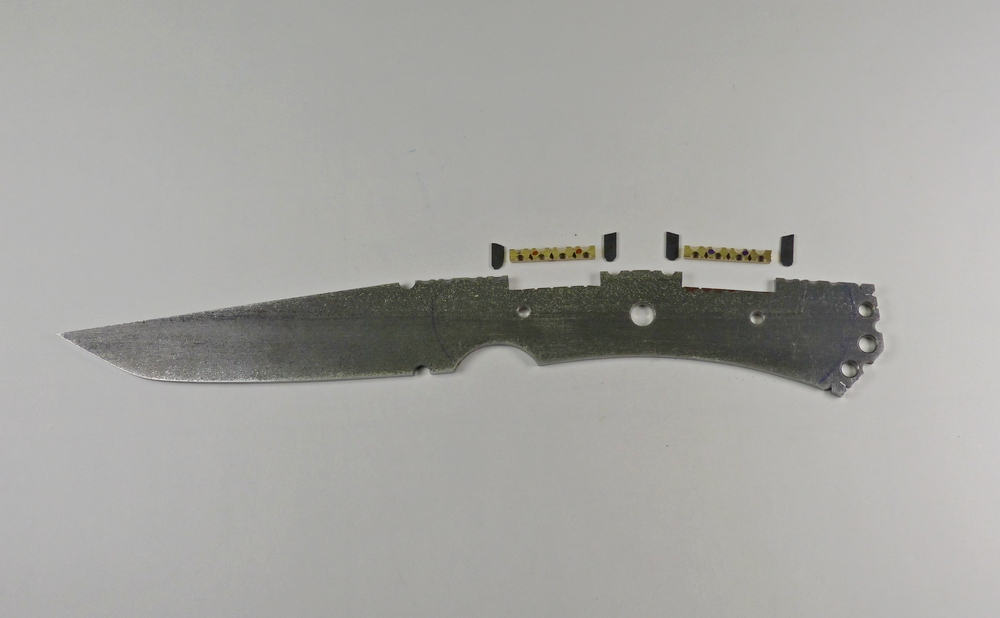
5
6
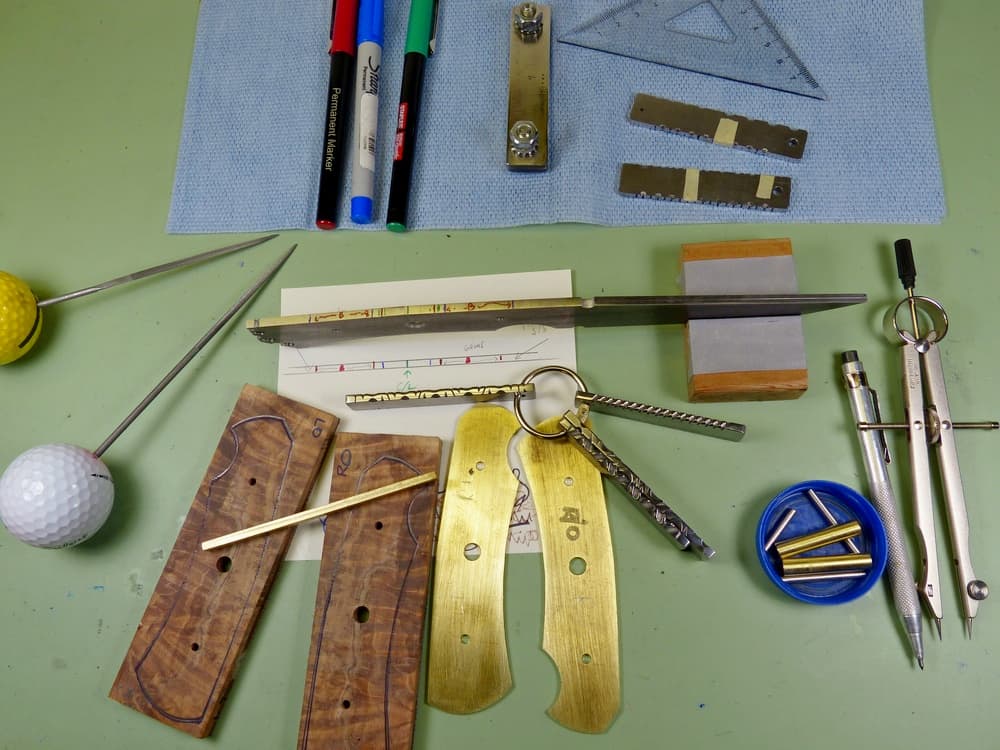
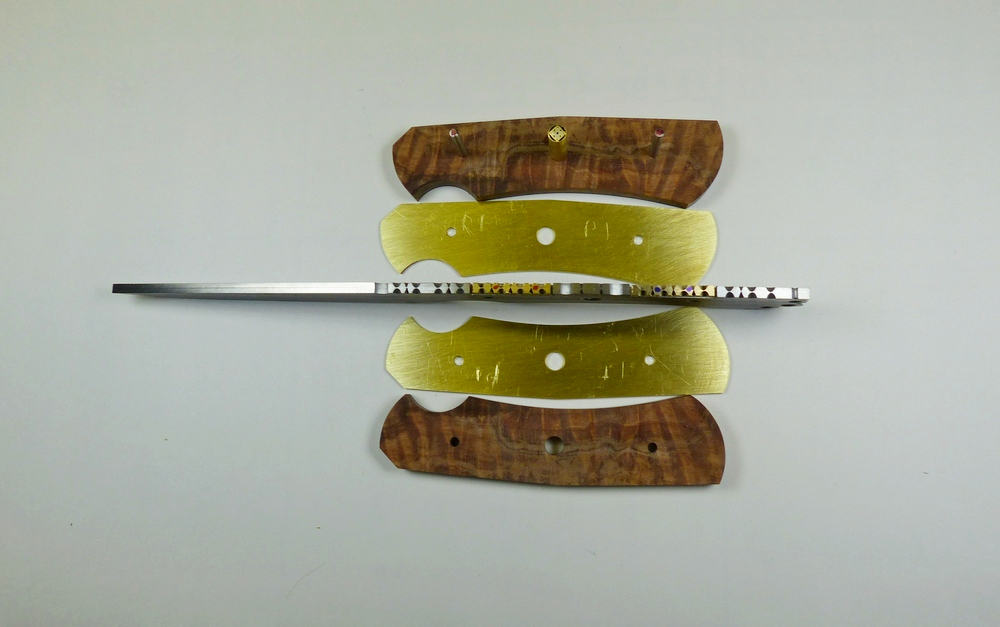
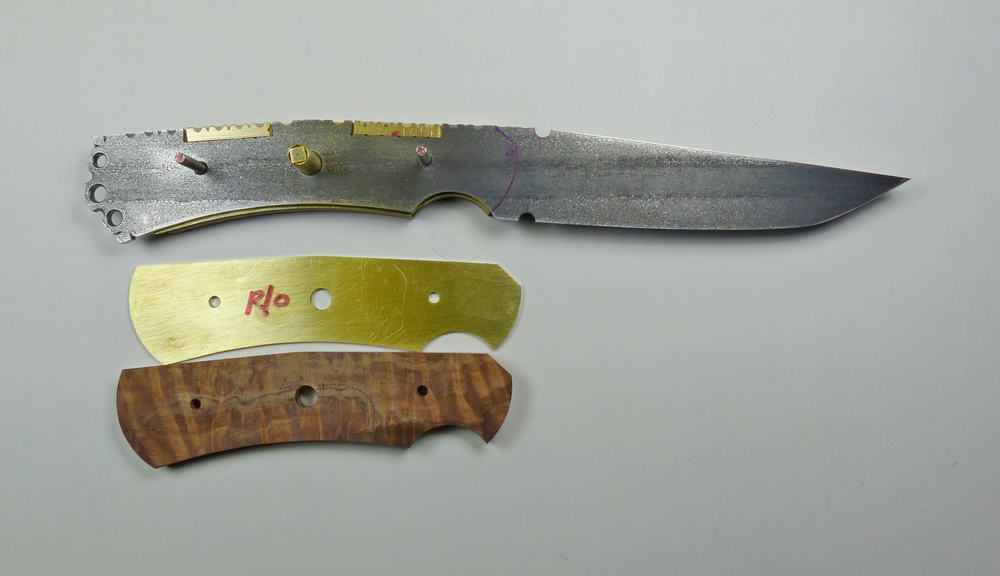
Photo numbers 7 to 9 show some of the different pieces and how they assemble towards the final fitting.
7
8
9
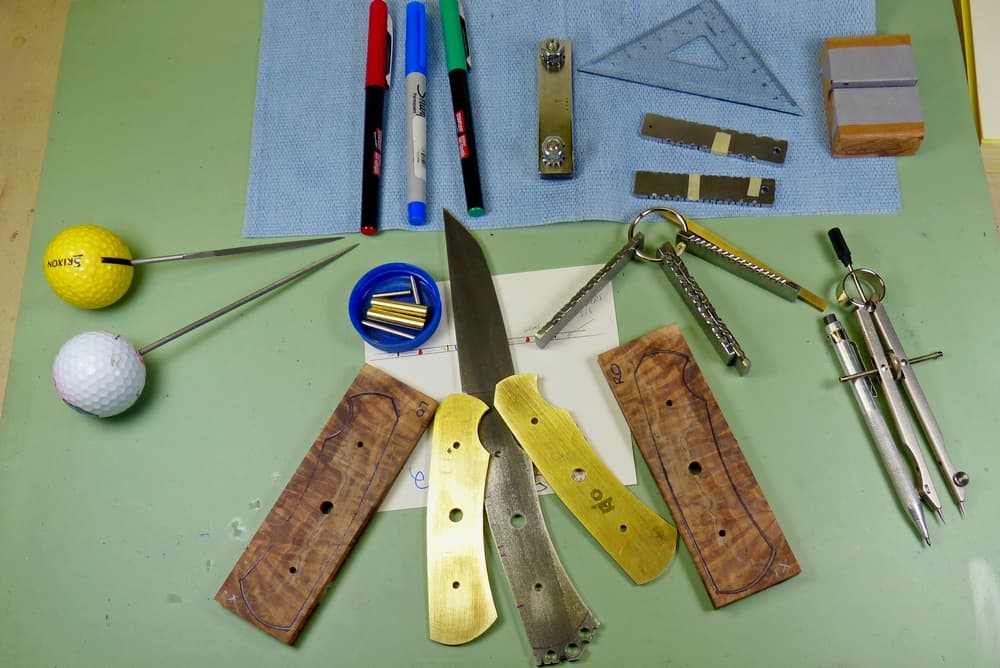
Photo numbers 10 to 13 show the pieces against the original scale drawing of my design and how they match up.
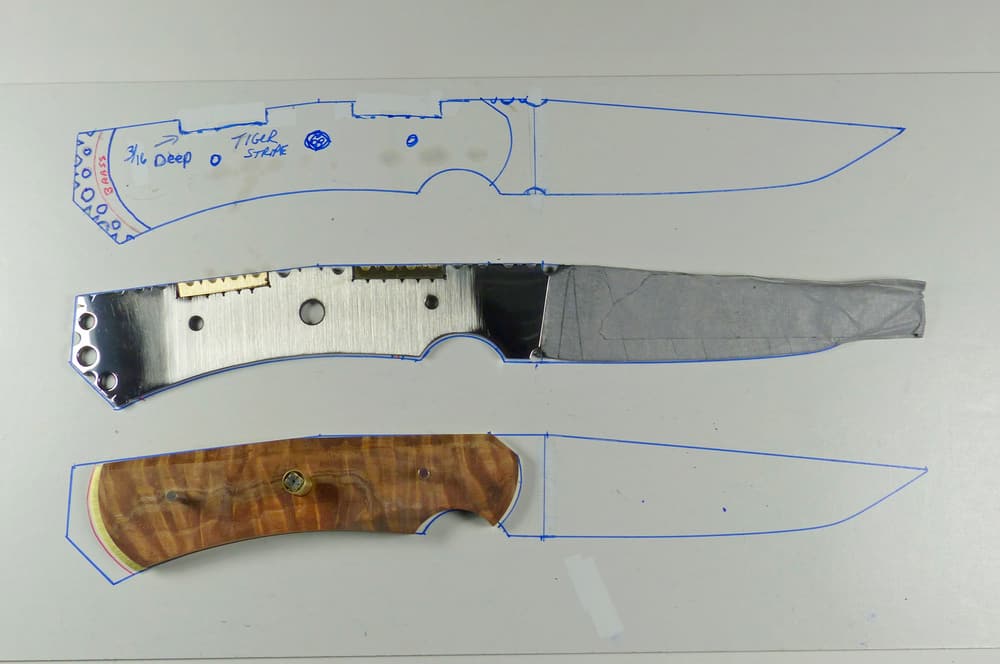
10
11
12
13
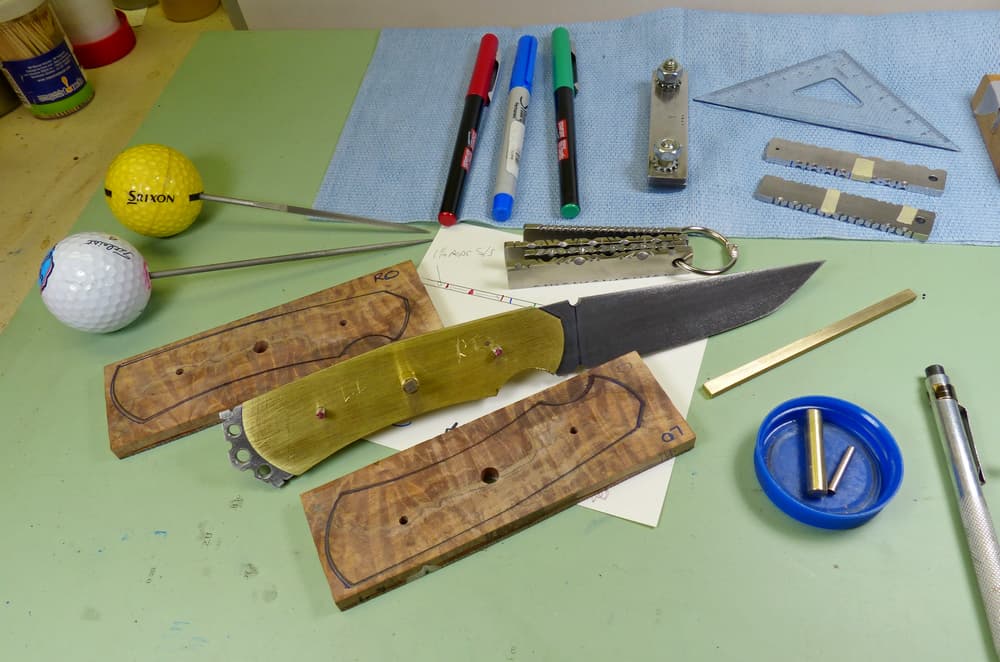
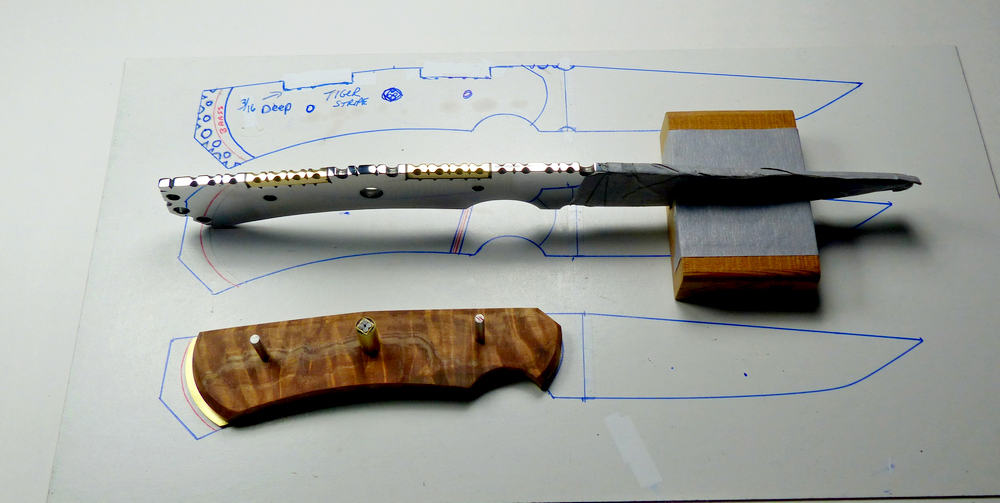
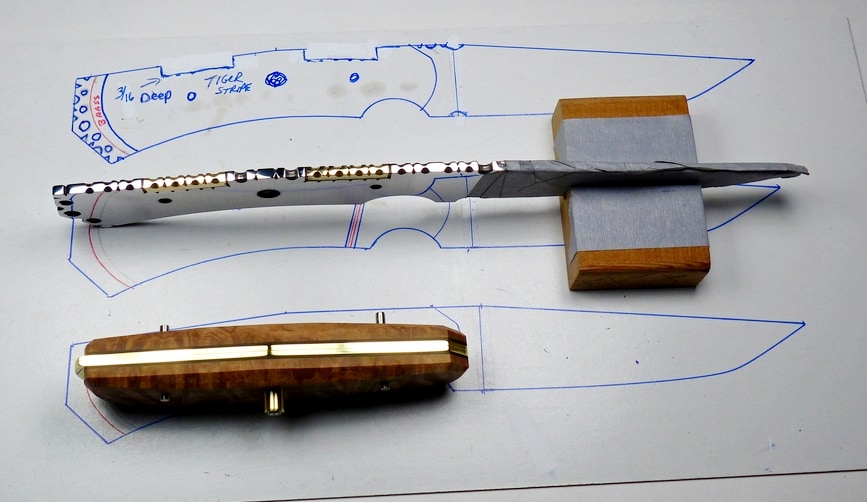
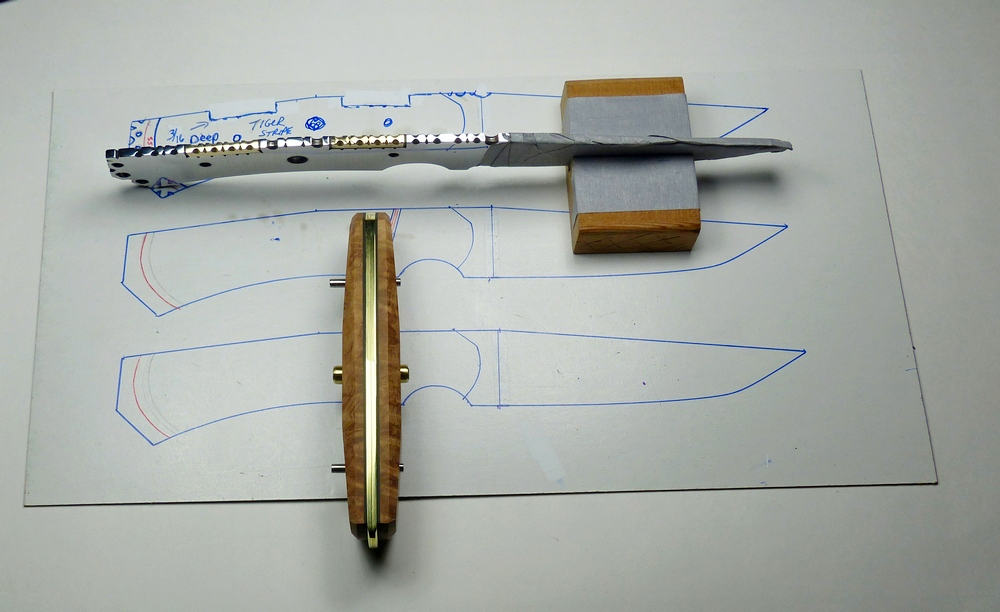
Photo numbers 14 to 17 show more pre-glue up assembly trial fitting – some of the pieces have been further shaped and contoured which cannot be done after the glue up.
14
15
16

17
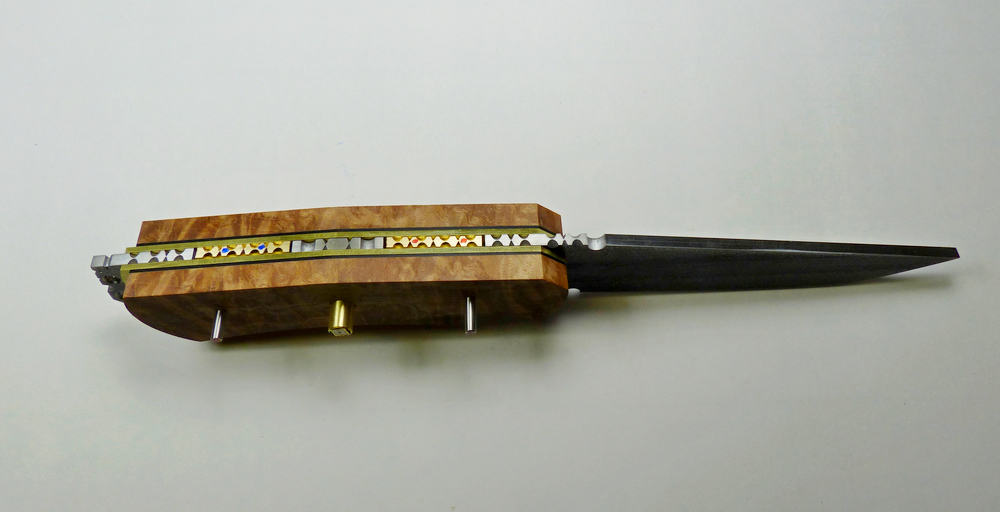
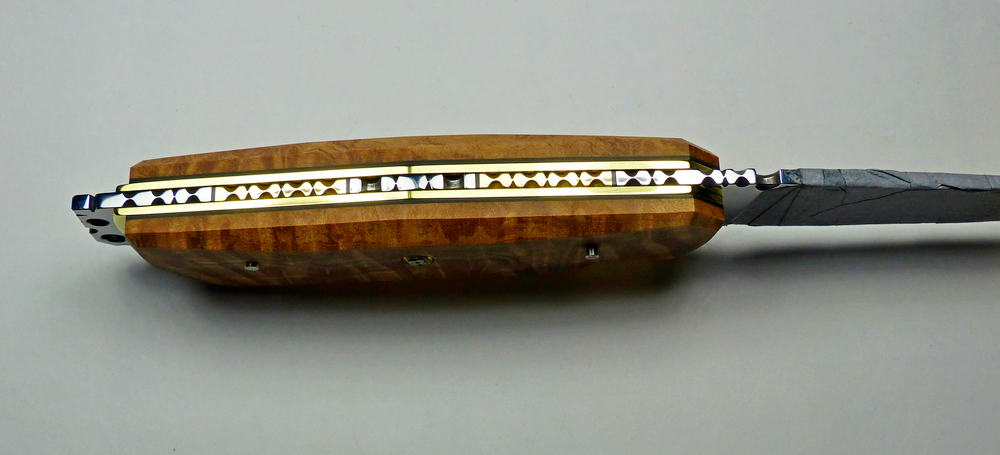
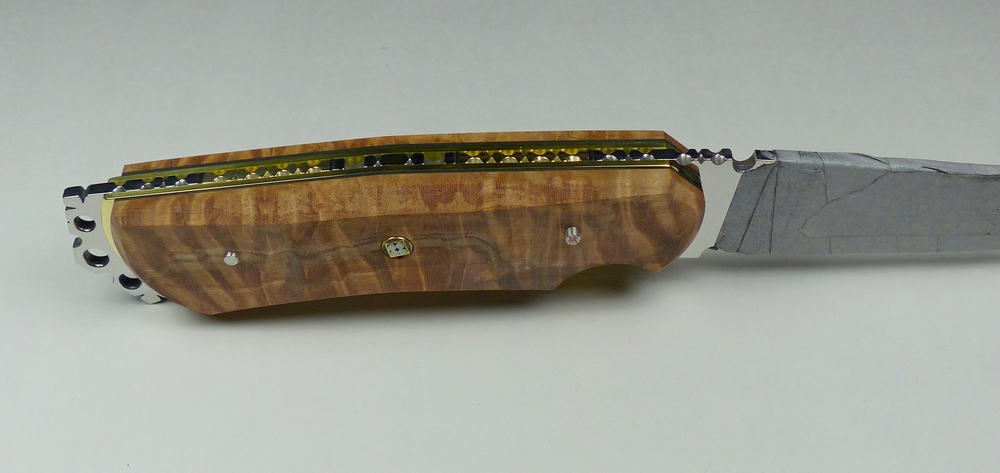
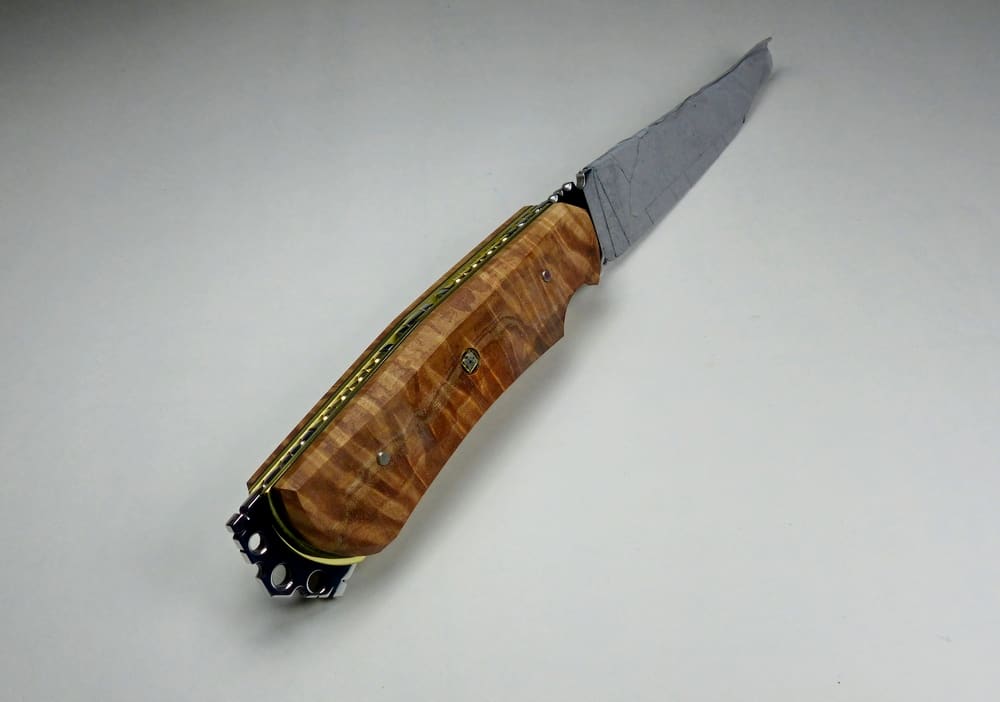
Photo numbers 18 to 21 show the finished — heat treated, shaped, contoured and polished — knife. At this point your original idea is a reality and you made it all the way though without any mistakes and can let out a sigh of relief and go on to your next project.
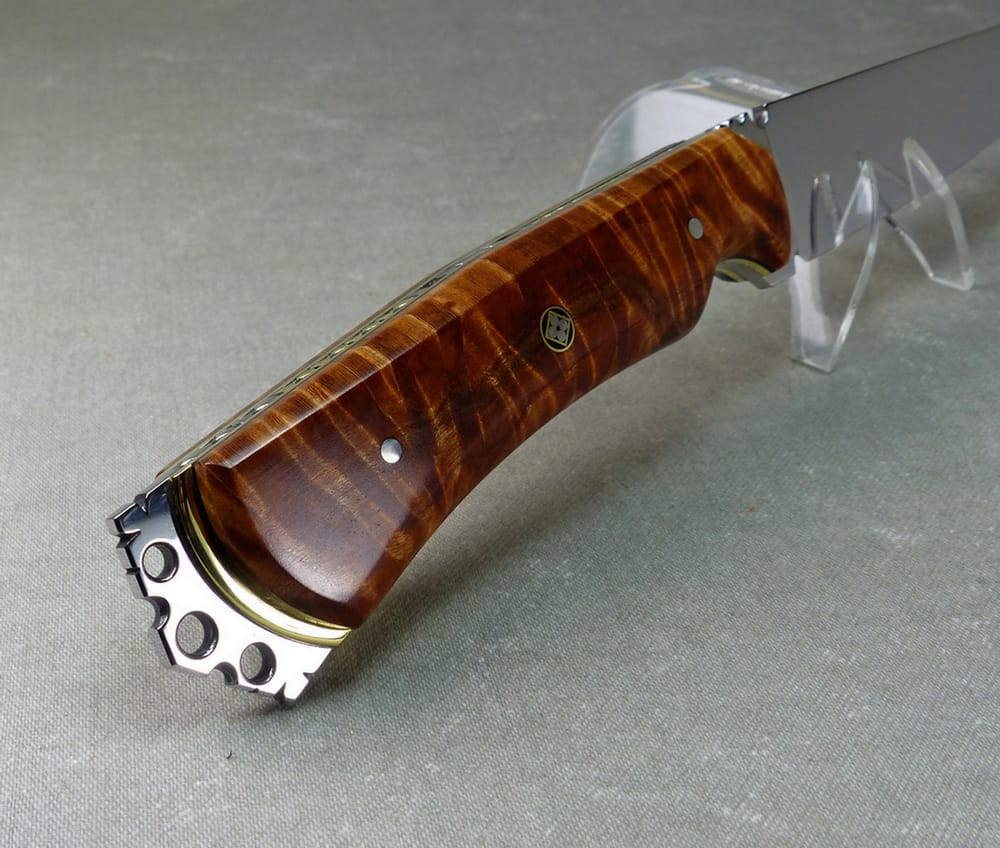
18
19
20
21