Written by: Kaitlyn Frolek, Gallery Assistant
- To read Part 2 of this series on black and white photography click here.
Black and white analogue photography has always been one of my favourite practices as an artist. My father gave me his camera when I was seventeen years old and I have kept it close over the past ten years; using it as often as I can. I find such satisfaction in going out on a walk or hike with my camera capturing images of things that might normally be overlooked, and giving them new light through a photograph.
This blog will be one of a small series into the practices used by photographers for years, mainly pertaining to Black and White darkroom practices. I feel it is most important to start from the beginning – the Camera Obscura.
A few things that should be mentioned before we dive into the magic that is photography, in regards to how light works, and how it makes a picture.
Light is everywhere! Without light you cannot have a photograph. Here are some examples of how light can work:
- We see light when it is reflected from its source or reflected from an object,
- Light can move, it bounces or reflects and can be bent or refracted,
- White light is made up of all the colors in the spectrum,
- Shadows occur when something (an object) comes between light and another surface,
- Light varies by brightness.
It is essential to know and understand that photography is turning light into an image. An image is an illusion. Anything that is a representation in light of a real object is an image. So how does all this light make an image?
Camera Obscura
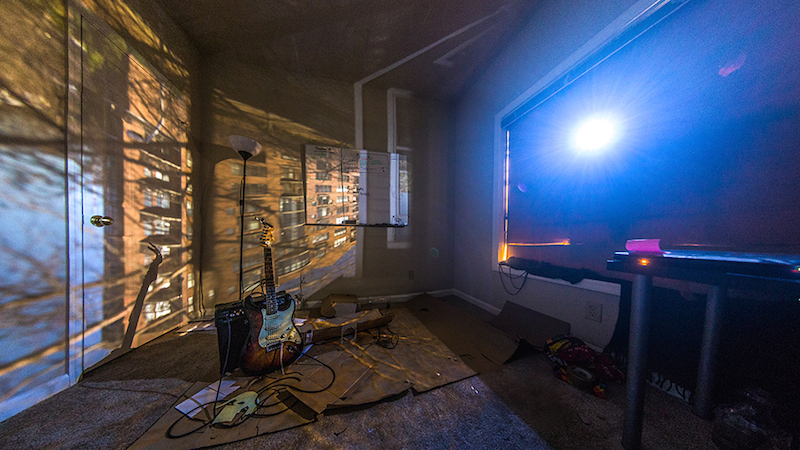
This is an example of a large camera obscura. One can see the blacked out window and the exterior image passing through the hole, and being inverted on the opposite wall.
One of the first types of photography known to us is the Camera Obscura, a Latin word meaning “dark room.” There are two ways you can create the camera obscura. One, transform a room into a very dark space, block out the windows and make a very small hole in the window covering. Or two, you can create a “light tight” room outside and in the window covering make a small hole like the first example. This can be done most successfully on a sunny day. What you then will see on the opposite wall to the small hole is the image displayed from outside, but upside down or inverted. This is a simple law in physics: light will travel in a straight line and instead of scattering off the image being captured, the light will travel through the hole and some rays of light reflected from the bright surface will pass through the hole without scattering. The rays or image reflected will be inverted on the wall opposite the hole in the window. The surface opposite the window is most commonly a white or pale wall, optimal for seeing the image more clearly.
This process of using the camera obscura has been used for hundreds of years for many different processes. Artists used it to create better accuracy and proportion when painting and drawing from life. This process can also be used to capture or see an eclipse, so one does not have to look directly at the sun, but can still see the eclipse without damaging the eyes.
The camera obscura was the first type of camera or photography used. It also initiated the invention of the pinhole camera, and later the first cameras using lenses. In my next two blog posts I will discuss the creation and use of the pinhole camera, and different methods of making these wonderful inventions. My final post will be an accumulation of the process and invention of cameras, and the magic of the process of photography, as well as different lenses that can be used in analogue cameras and darkroom practices. Keep an eye out for the next blog posts on the subject and the wonders of light and the camera!
—
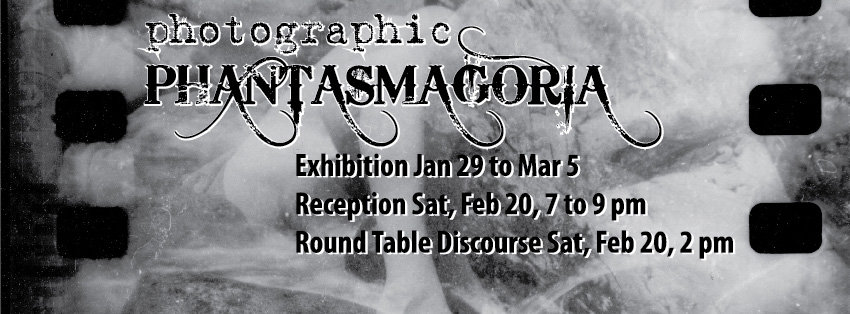
To see the results of these photography methods in person, come view Photographic Phantasmagoria in Affinity Gallery! More information.